Showing posts with label Milk. Show all posts

October 5, 2010

Homemade Quark - A Staple in German Cuisine

When people ask is if there is any specific type of food that we miss from Germany by living in the States we usually tell them that we can get almost everything here in California. And even a lot more as we love the variety of different ethnic food markets and also the abundance of local fruits and vegetables. But there is one staple in German cuisine that is hard to find here, and even when found in specialty stores and now even at Whole Foods, its quality is lacking and it is sold way overpriced: a soft cheese called “Quark”.

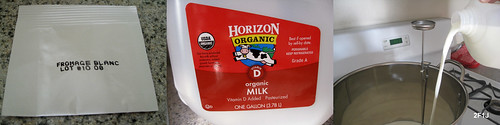
Quark is similar to other soft cheeses such as Fromage Blanc in that it is a white, unripened cheese. It is made without rennet and can have a variety of consistencies ranging from yogurt to dry ricotta, depending on how long the curds are allowed to drain during its preparation. Similar to Fromage Blanc, plain Quark has a much lower fat content than cream cheeses. In Germany, Quark can be bought in three different varieties: Magerquark (low fat Quark) is prepared from low fat milk, Quark is made with whole milk, and Sahnequark (cream Quark) is Quark mixed with heavy cream (4 to 1 ratio). Quark is commonly used as a breakfast spread (Quark topped with jam on a fresh oven-baked roll is a breakfast classic), for baking (e.g. in doughs or cheesecakes), and in a large variety of Quark desserts, mostly with fresh fruits.

Since we have recently started to venture into cheesemaking at home, we were highly motivated to try making our first Homemade Quark.


Before you get started, one reminder about cheesemaking: make sure to sterilize all your equipment before use, we typically rinse everything with hot water.

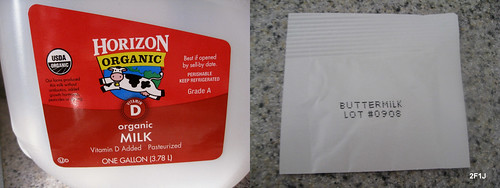
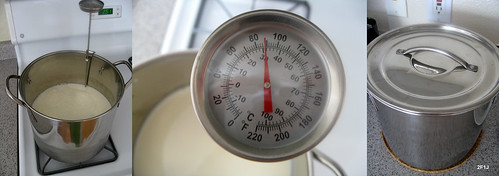
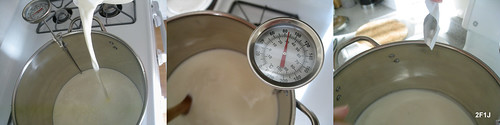
Pour whole milk into large cooking pot equipped with a thermometer. Slowly heat milk to 32 °C (88 °F). Remove pot from cooking stove and add 1 packet of direct set buttermilk starter. Gently mix in the starter with a cooking ladle in an up and down motion. Then cover the pot and let it sit at room temperature for 24 hours.

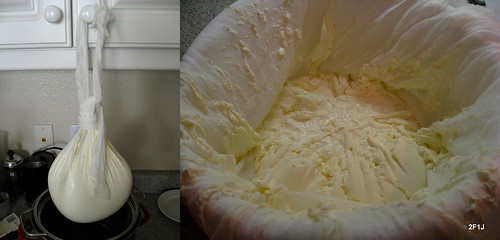
Sterilize butter muslin in boiling water for 5 minutes, then place it into a colander on top of another pot for draining the curds.

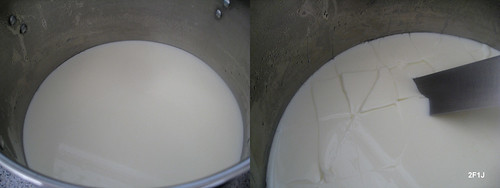
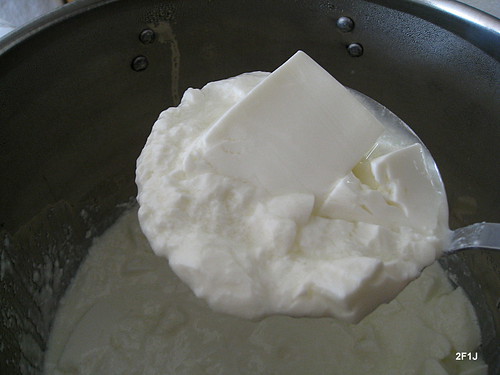
Cut curds with a cheese knife into large cubicles, this will help with better draining.

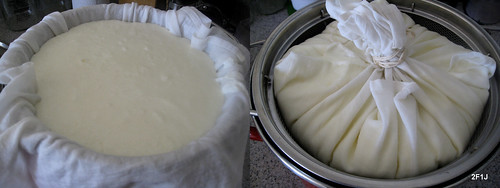
Transfer curds into the butter-muslin lined colander. Tie ends of butter muslin into a knot and let the curds drain for 12-24 hours, depending on the desired consistency. We have found that it works very well for us if we cover the pot again and place it into a refrigerator to allow draining for 24 hours. This way we can also prepare Quark during weekdays when we are not home during the day.

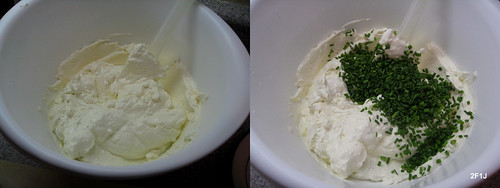
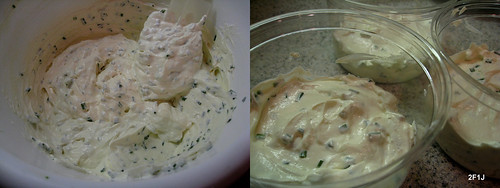
After draining you can adjust the consistency of your Quark by adding back in some of the whey, or by adding some heavy cream for a creamier taste.

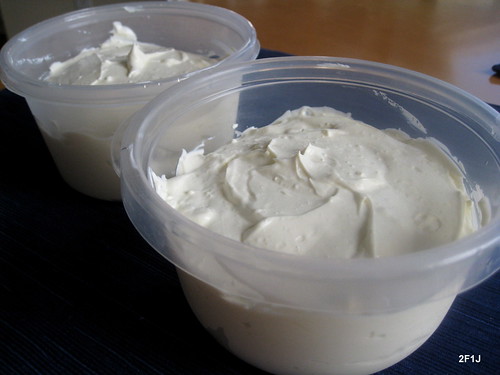
Transfer quark into smaller containers for storage. We have found that it will be good for at least a week. We were very happy how our first homemade Quark turned out – although the complete process takes about two days, the actual work amount is rather minimal – and we were delighted that its taste was up to par, and probably better due to its freshness, than Quark we could buy back in Germany.

Recipe adapted from “Home Cheesemaking” by Ricki Carroll

3.8 L (1 Gallon) pasteurized milk
1 packet direct-set buttermilk starter (New England Cheesemaking Supply Company)
Heavy cream

Makes about 1.2 kg (2.6 pounds) of Quark

July 17, 2010

Fromage Blanc with Chives – Our First Homemade Cheese

The process of making food is simple and extremely complex at the same time. You take some basic ingredients, of course trying to use those that are the freshest and of the highest quality, and with a few, quite mechanical and technical steps they can be transformed into an amazing variety of delicious food. As we both are foodies and scientists simultaneously, there are some kinds of food that hold a deep fascination for us, and we intend to learn a lot more about them in the next few years. Take for example cheese, only one basic ingredient – milk – is needed, and with the help of bacteria or enzymes a fermentation process followed by different ripening processes transformed into such a fascinating diversity of different cheeses worldwide.

To get started and learn about how to make our own cheese at home, we followed the guidance of Ricki Carroll in her excellent book “Home Cheesemaking” to start out with soft cheeses that require less equipment than hard cheeses. We picked Fromage Blanc for our first attempt on preparing a homemade cheese.


“Fromage Blanc” means “White Cheese” and is a European-Style cow’s milk cheese, very similar to German “Quark” (more to come soon about this classical staple in German cuisine that is unfortunately very hard to find in the US). It originated from Belgium and the North of France and is a member of “Fromage Frais” (“Fresh Cheese”). For a fresh, unripened cheese it comes with a surprisingly tasty and creamy flavor, and its low calorie and fat content make it a great substitute for cream cheese.

You need very few ingredients and equipment to make Fromage Blanc. Make sure you buy pasteurized (or even raw) and not ultrapasteurized milk, since your milk needs to still “live”. We ordered several packets of “direct-set Fromage Blanc starter” from Ricki Carroll's online cheesemaking supply store from which we also got a thermometer and a curd knife. Other than that you only need a large cooking pot, a colander, and butter muslin. Since you are dealing with live cultures you want to keep everything very clean to avoid any cross contamination with other bacteria, so we rinsed all equipment with hot water before use.

Pour milk into large cooking pot and slowly heat the milk to 30 degree Celsius (86 degree Fahrenheit) - take your time heating the milk as you don’t want to cause too much “stress”, it took about 10 minutes to reach the desired temperature. Add one packet of direct set Fromage Blanc starter mix #C20 (which contains streptococcus lactis, streptococcus creamoris, lactis biovar diacetylactis bacterial strains, vegetable rennet and malto dextrin) and mix gently but thoroughly. Cover and let sit at room temperature for at least 12 hours, we actually let it sit for 18 hours as we had a lazy Sunday morning getting up late …

Place a colander into another pot or bowl, sterilize your butter muslin in boiling water for 5 minutes and line the colander with it.

By now a nice curd will have formed in your cooking pot, when you push it with your hand you want to feel some resistance and it should also give a nice, clean break when you cut it with your curd knife. In this recipe it is not important that you cut it into smaller curds, but we enjoy doing it anyway as it is a lot of fun. It will also help accelerate the draining process.

Ladle your cut curds into the colander. We let the curds drain for 15 minutes and then tied the ends of the butter muslin up and improvised a little bit: we used the door knob of one of our kitchen cabinets to hang it for draining. We let it drain for 5 hours, checked the consistency but felt it was still too liquid, and let it drain for another 3 hours.

Transfer the drained curds into a bowl. We seasoned them with some cheese salt and cream to taste, mixing thoroughly, and then added some chopped chives. Finally, we transferred our first, homemade Fromage Blanc into smaller containers. Since we got about 2 pounds of cheese that we could hardly all eat ourselves we surprised some of our friends the next day with some of it. When storing the cheese in the refrigerator it will be good for about 1-2 weeks.

Recipe adapted from “Home Cheesemaking” by Ricki Carroll

3.8 L (1 Gallon) pasteurized milk
1 packet direct-set Fromage Blanc starter
Cheese salt
Heavy cream
Fresh, chopped chives